SiteSupra User Manual
Welcome to the SiteSupra CMS guide. This guide provides comprehensive information on how to organize your SiteSupra site’s content and manage it easily. Free and open source, SiteSupra offers fast and easy website development and makes website editing and administration stress-free thanks to intuitive visual CMS.
Log in
Start by logging into the admin panel of your website. Visit your site’s login page by placing “/backend” after your domain name e.g. http://example.com/backend.
Default login name is admin@sitesupra.org and password is admin.
Initial view
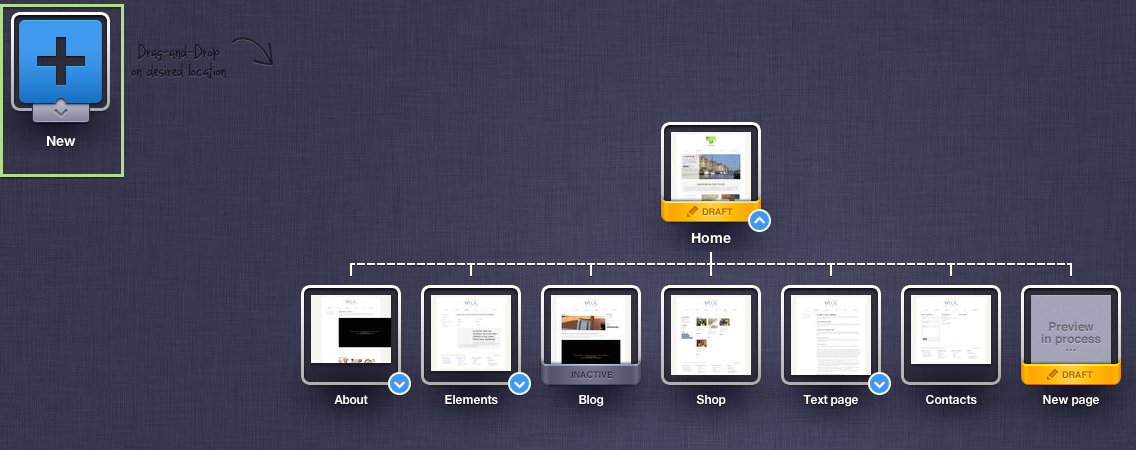
After you logged in, you are on the site’s main page view. This is the Home page of your website. Here your creativity can break out and let you build as lovely website as possible.
- On the upper menu you can do following:
- Open the Dashboard;
- Open website’s structure or “Sitemap”;
- Open Page for editing
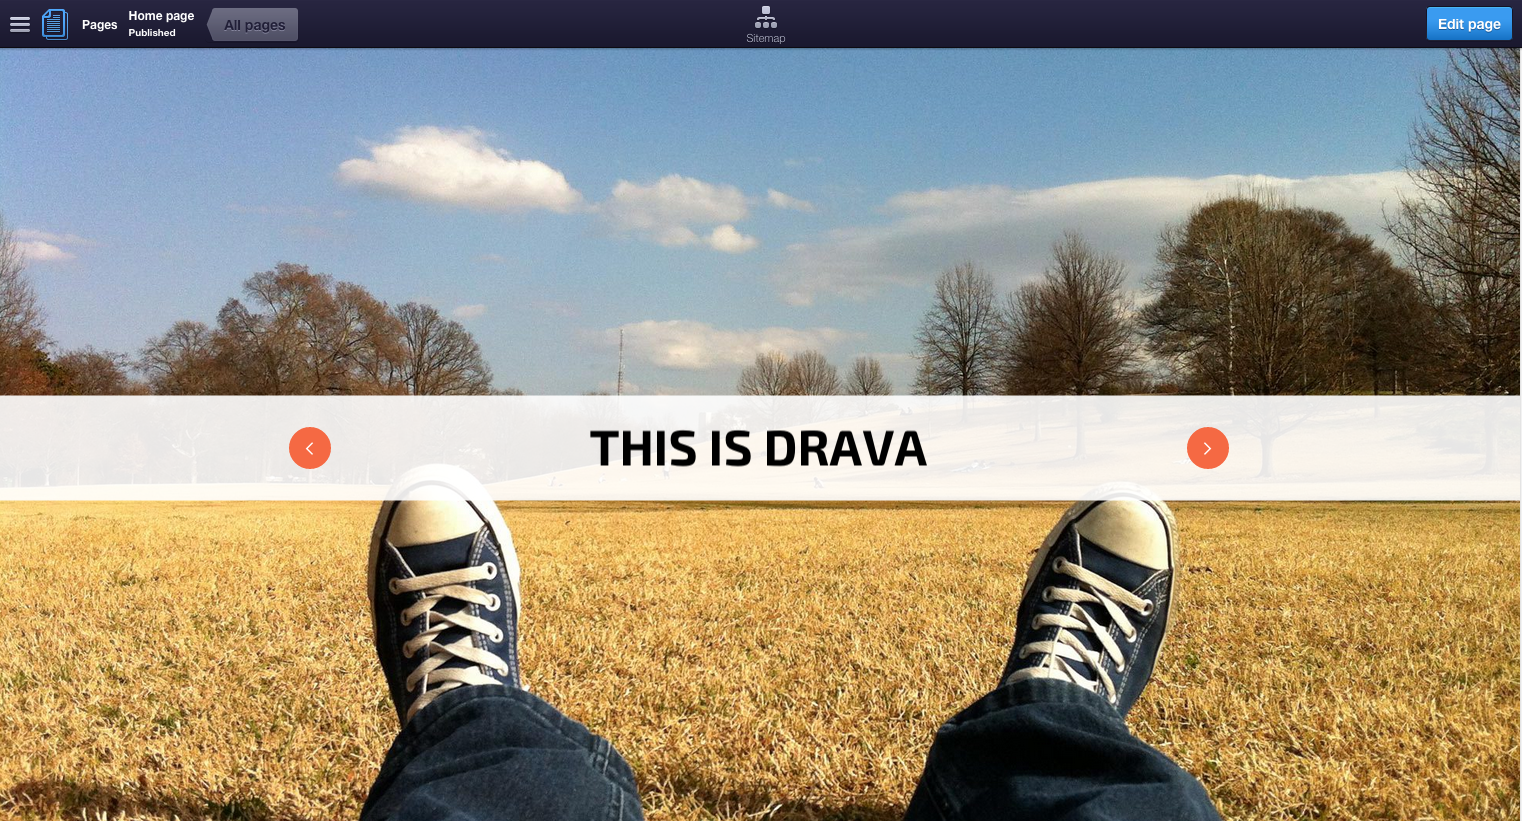
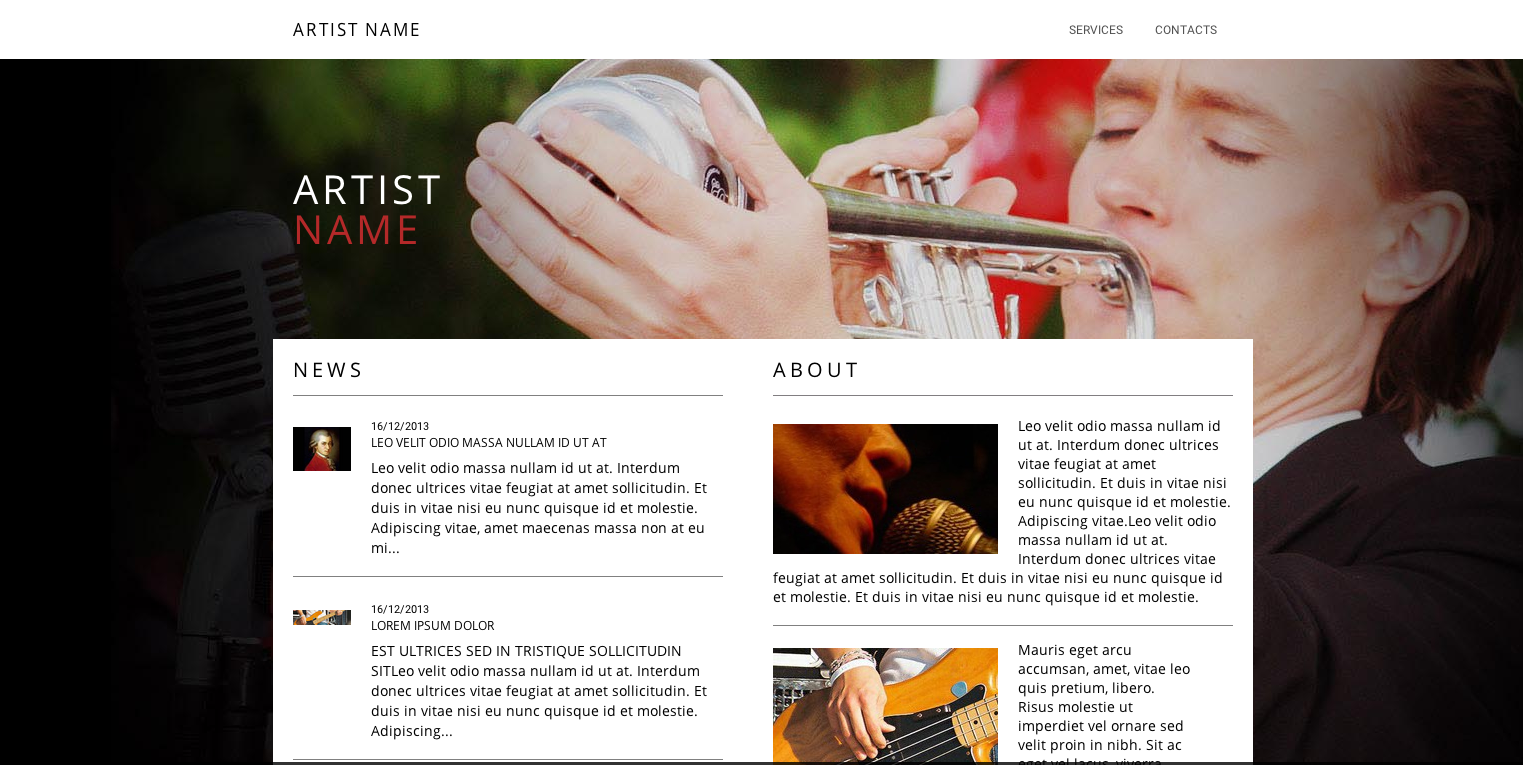
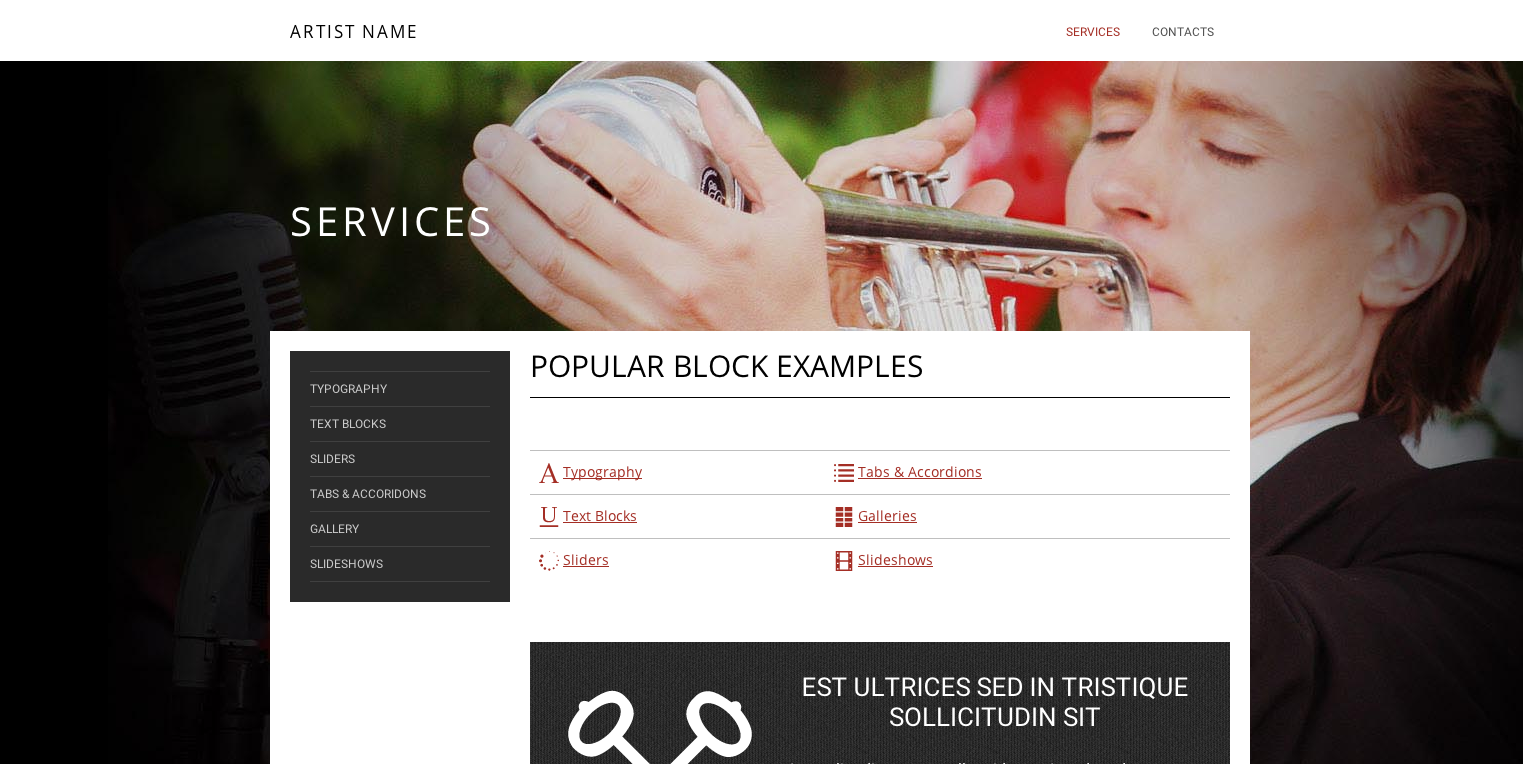
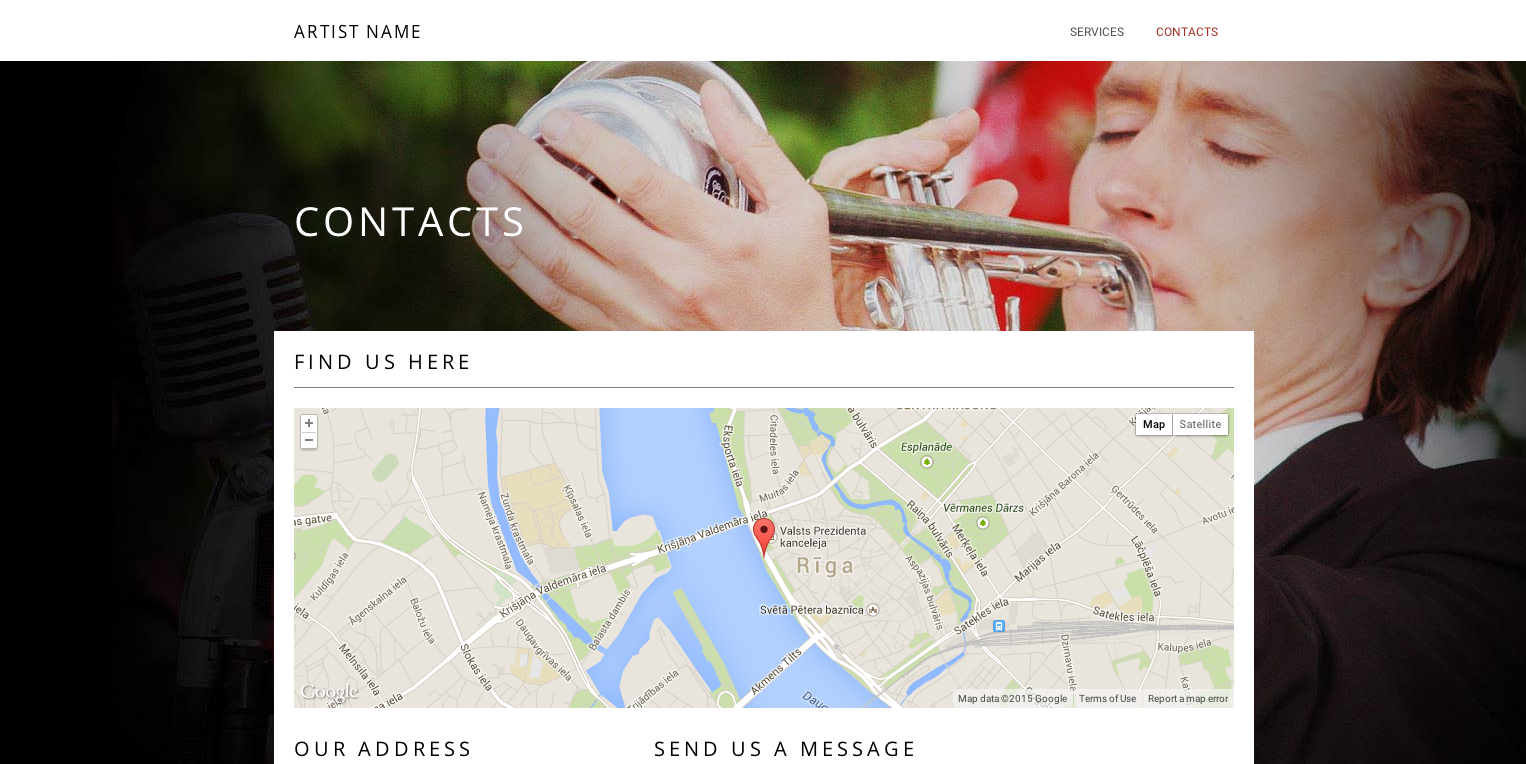
We recommend you to check the demo of Home page and the Blocks to see most of the SiteSupra page and text management features. However, ahead of jumping in and start editing, take a look at the website’s structure by clicking Sitemap icon.
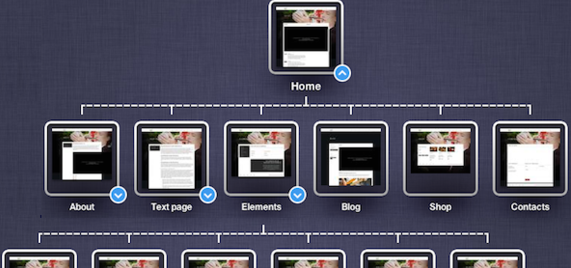
Site Structure Management
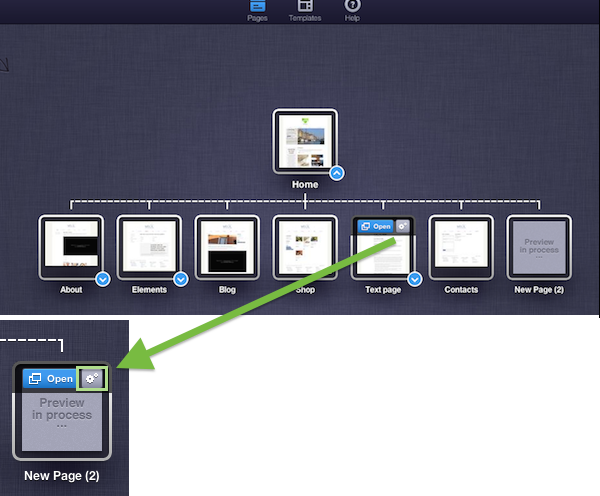
To delete a page
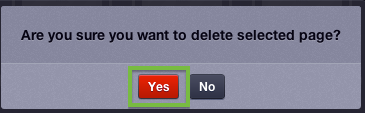
Choose the page you have decided to delete and click the Gears icon. To delete a page click Delete and confirm requested action by clicking Yes button.

To add a new page
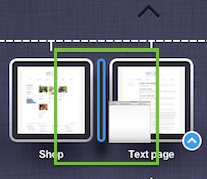
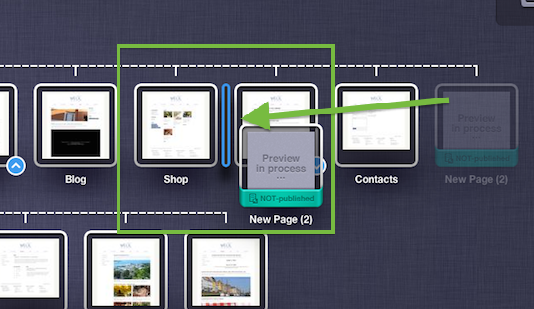
- Click and hold ” + “ icon and drag & drop it to the required location.
- When you hold and move the page around the Sitemap the drop location will be marked in blue.
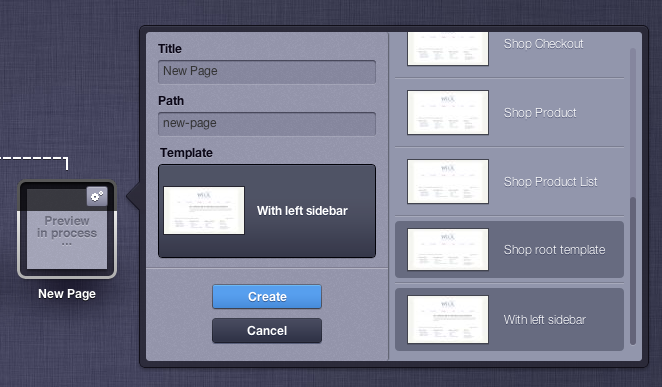
- After you drop the page on the desired location a page properties window appears. Specify page Title. You may define Path which is a page name that appears in the page address.
- Click Template to choose a page template you want. You can go through a wide array of templates.
- When you make your choice, click Create button.
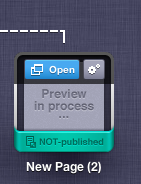
- Open created new page and specify required content for page blocks. Then click Publish to the upper right of the window.

NOTE
If by an accident you have dropped your new page in a wrong place, you can easily change page order in the menu. Simply drag & drop new page to the required place in Sitemap view.
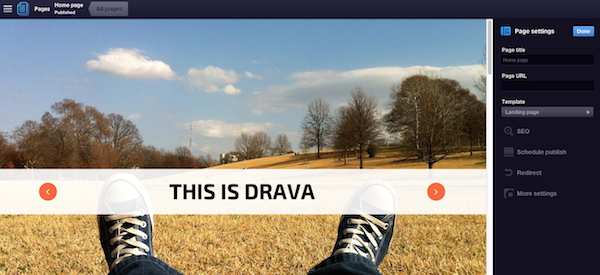
Page Settings
Page Settings contains the page editing menu in the upper right pane and here you can specify following:
- Page Title - Page Heading
- Page URL - Page address
- SEO - additional parameters for website optimisation to help perform better in search results.
- Schedule publish - you can schedule a page to publish automatically in the future.
- Redirect - you can redirect your page visitors to other pages or external recources.
- More settings - additional page settings:
- Page status management (active or inactive)
- Page appearance in search results (Yes or No)
- Page appearance in Menu
- Page appearance in Sitemap
- Admission to translate the page
After you have made all the necessary changes, click Save to save changes. To publish final version of the page, click Publish. If you wish to continue working with this page some other time, click Close.
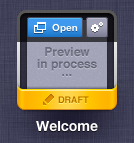
Page status
While in a Sitemap view, above the page icons or folders can appear inscription Draft, which means that page was changed, but the changes were not published. This inscription appears whenever you save the changes and close the page with the Close button without Publishing.
Main Toolbar options
General editing options are displayed at the top of the menu.

- Insert block - to insert new blocks on the page (see full description here [link to blocks])
- Page blocks - displays a list of elements available for editing;
- Page settings - to access and manage page properties
- Page Title
- Page URL
- Template
- SEO
- Schedule publish
- Redirect
- More settings
Main Menu Management
The main menu block automatically picks up pages located under the Home page and builds menu according to the web site styles. If you want your main menu to have a page simply place it under the Home page in the SiteMap. You can drag and drop the pages into this level or rename existing pages. Here’s how:
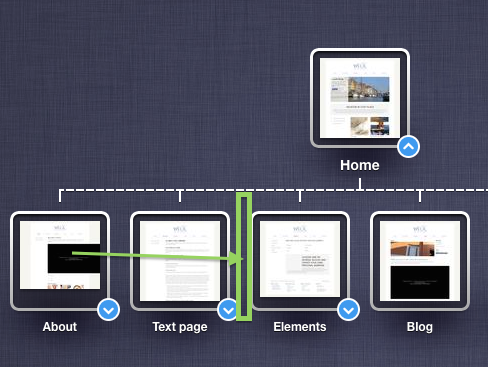
To change page order in the menu
- You can access Site map by clicking Sitemap or All pages buttons on the page toolbar.

- In the Site map, click and hold required page and drag it to the new location.
Blocks
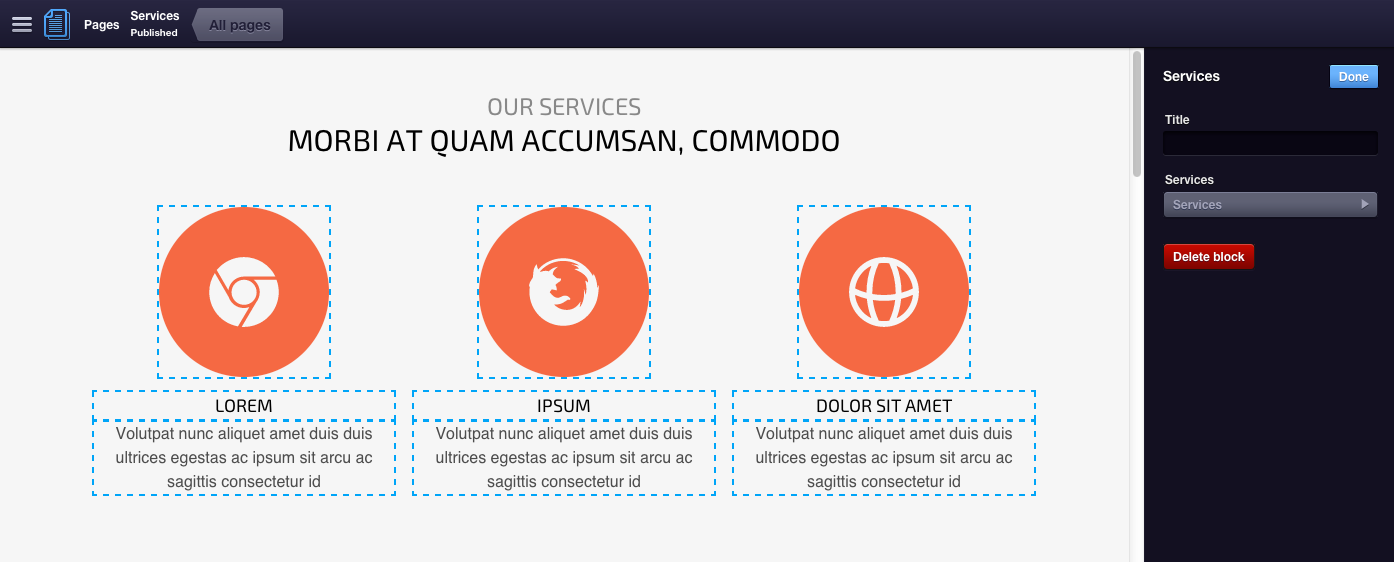
Each page consists of several functional widgets, the blocks, which add functions and events to your website. You can edit them by clicking and managing customisations in the block properties which opens on the right. For each block there are different properties, for example, you can add images to the gallery block and set the links for social media follow block.
To add new block
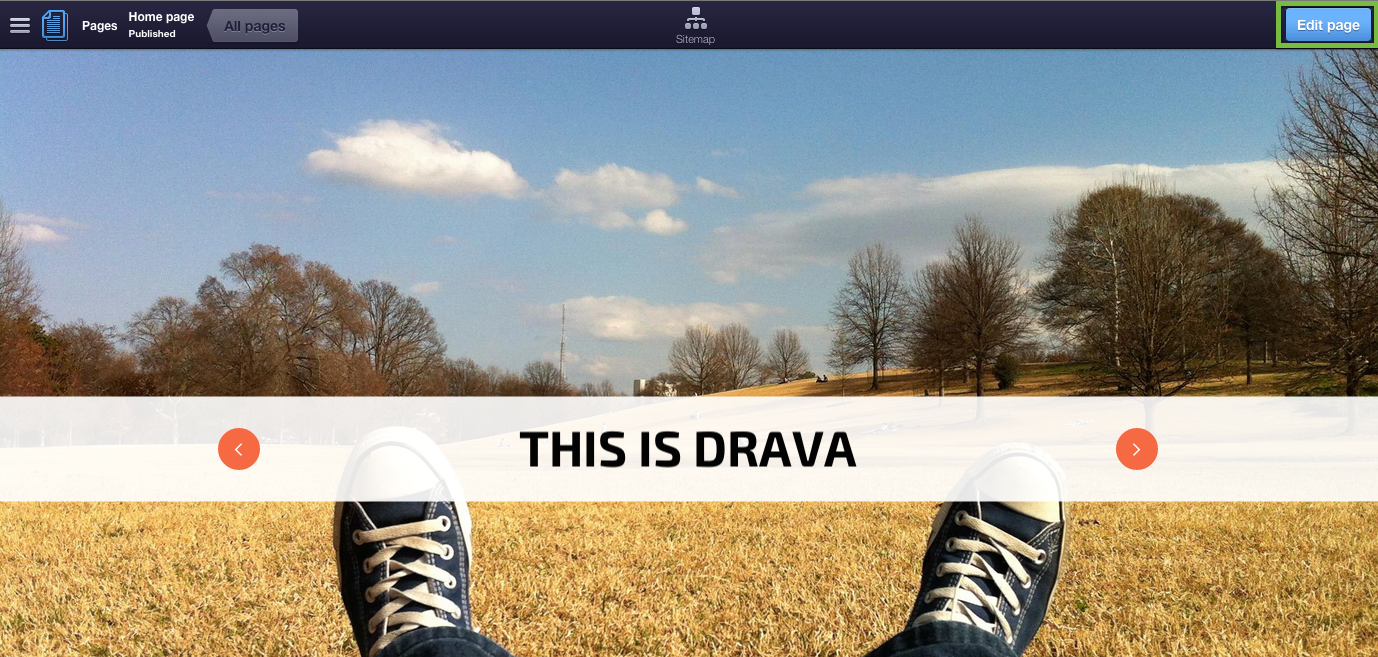
- While in a Sitemap view, select the page you want to edit and click Open.
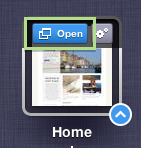
- Click Edit page button to the upper right of the window.
- Click Insert block in the main toolbar, which appears on top of the page. The Insert block panel opens on the left. Then select Features.

- Click the block you need and drag & drop it to where you want it in the page.
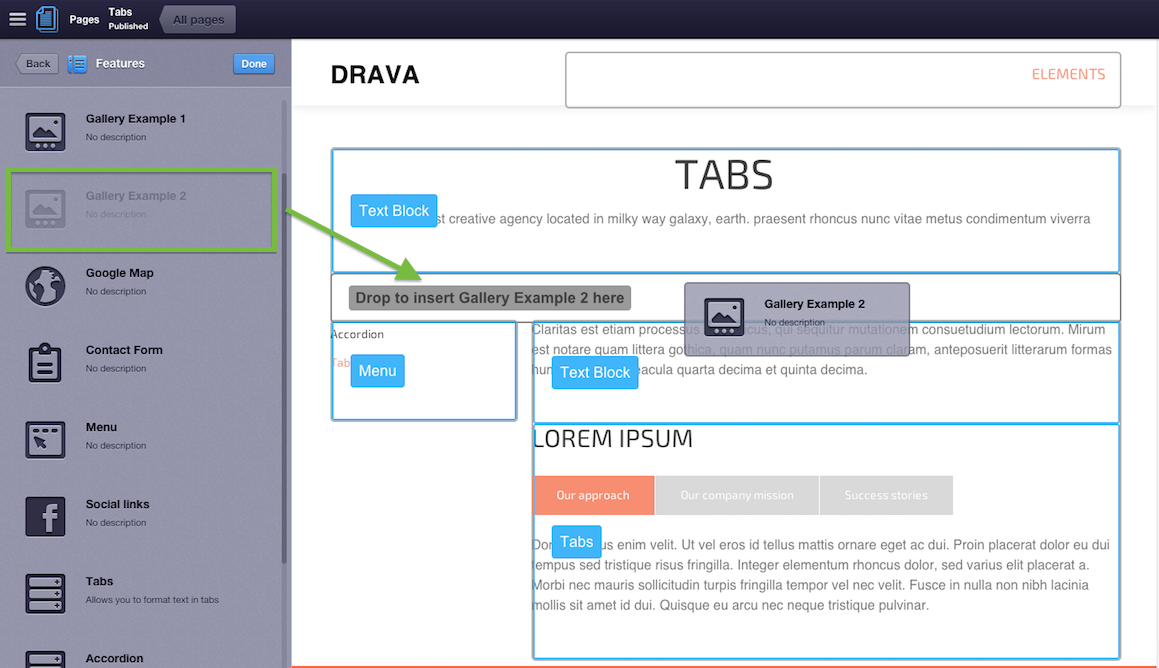
- Specify required content for the block properties. Then click Done and Publish the page.
To delete block
If you don’t need a certain block it’s easy to remove it from the page:
- While in a Sitemap view, select the page you want to edit and click Open.
- Click Edit page button to the upper right of the window to start page customisation.
- Click the block you want to remove. Block properties panel opens on the right side of window.
- To remove a block click Delete block button.

- Confirm your choice and click Yes.
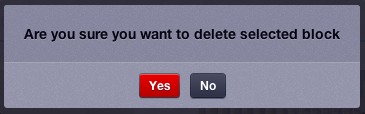
- To finish work and save changes, click Publish button to the upper right of the window.
To move blocks within a page
It’s easy to change location of the block on a page, here’s how:
- While in the Sitemap view, select the page you want to edit and click Open.
- Click Edit page button to the upper right of the window.
- Select the block you want to move by Clicking and holding it with the mouse and move it to the new location. Make sure not to click the block as you will enter in a block editing mode where moving blocks isn’t possible. When you hold and move the block around the page the drop location will be marked in blue.
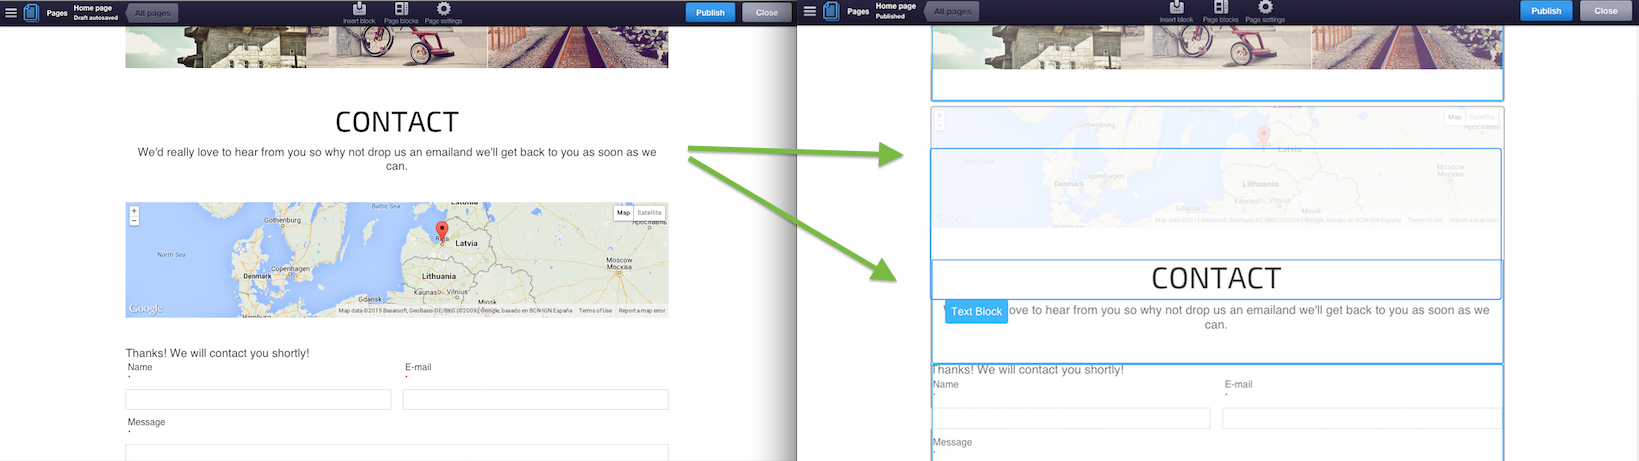
- To finish and save block repositioning changes within a page, click Publish button on right-top of the window.
IMPORTANT: Blocks are divided into two main categories:
- Global;
- Non-Global.
If a block is Non-Global, it will appear only on pages where it is added manually, but if a block is Global, it will appear on all pages from selected template. These settings you can specify while creating or customising Templates.
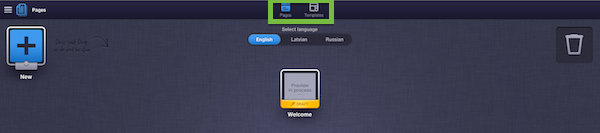
Templates
Templates control how your website appears. SiteSupra template provides a method of integration between content and blocks in a specific, controlled view. Site is created by first placing one or more blocks on a template and then creating pages based on those templates. While each template can be configured separately, when adding new pages and selecting template, page will consist of template’s specified design, layout and blocks within placeholders, so you can significantly save the time by creating new pages and content.
While in a Sitemap view, you can switch to Templates editing mode:
If you want to create a page with unique set of blocks to implement original page design, you would need to create a separate page template first so that other pages are not affected. Creating page template is easy, you can just duplicate a page template you like.
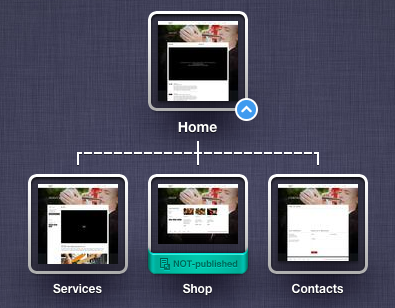
For example, website consists of three simple pages: Home, Services and Contacts.
Which in templates view will look like this:
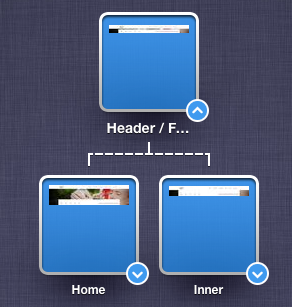
Where pages are built on basis of:
- Page Home is created from template Home, where Home page content is inherit Header/Footer and Home template content.
- Page Services is created from template Inner, where Services page content is inherit from Header/Footer and Inner templates.
- Page Contacts is created from template Inner, where Contacts page content is inherit from Header/Footer and Inner - the same as for Services.
While creating pages, you can customise templates separately by adding necessary blocks to the placeholders.
Dashboard
You can open the Dashboard by clicking the icon on the upper left of the page.

The admin panel is very simplistic and from here you can manage Back-office Users, Files or return to Site Structure Management.
Back-office Users
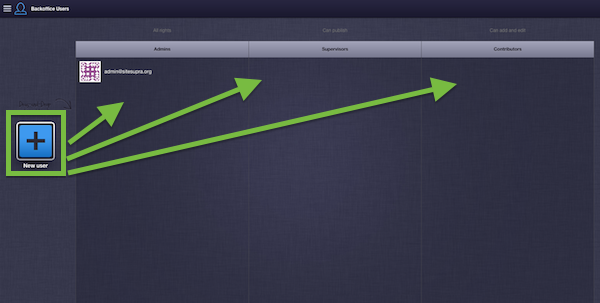
You can setup a user account for your website contributors and assign certain privileges. These privileges are known as roles. The following roles exist in the SiteSupra:
- Admins: You can do everything including creating new users and assigning them access rights.
- Supervisors: As a supervisor, you can publish (and unpublish) documents on the website, and approve or disapprove Contributor’s requests for publication.
- Contributors: As a contributor, you can create and edit content in the CMS. When your changes are ready to be published on the website, they have to be approved by a Supervisor.
You can add new users by clicking “+” on the left side and drag-and-drop the icon to necessary role.
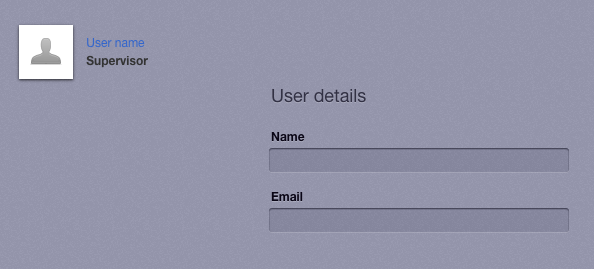
Then add User Name and E-mail, click Done. New user will receive invitation to become an admin, supervisor or contributor of your site.
Files
Program files (Files) app purpose is to gather all uploaded visual information files for further use on the website. This app also allows you to create the directory tree in order to improve your work with files.
General options are displayed at the top of the menu:
- Upload - possibility to upload necessary files
- New Folder - allows to create new directory
- Delete - possibility to delete unnecessary files or directories
Also it is possible to add new files by dragging and dropping them to required folders. To view image details, click on an image icon. From here you can also Download or Replace the file.